Setting up a masternode necessitates a fundamental grasp of Linux and blockchain technology, along with the capability to adhere to instructions meticulously. It also entails consistent upkeep and vigilant security measures, especially if your Cosanta (COSA) isn’t stored on a hardware wallet. Throughout the process, certain choices need to be considered, and there are additional optional measures that can be taken to enhance security.
You have the option to use commercial masternode hosting services, allowing you to delegate the daily management of your masternode to a professional operator. With these hosting services, you maintain complete control over the 10,000 COSA collateral while compensating the operator with an agreed-upon percentage of your rewards.
Before you begin
This guide is designed for those establishing their initial mainnet masternode. The necessary components include:
- 10,000 COSA
- A wallet for storing your Cosanta at Cosanta Core wallet
- A Linux server, preferably a Virtual Private Server (VPS)
Send the collateral
To set up a masternode, you need a Cosanta address with a single unspent transaction output (UTXO) of precisely 10,000 COSA. After the transaction is completed, various keys related to the transaction need to be extracted for later inclusion in a configuration file and registration transaction. This registration transaction serves as proof, recording the configuration on the blockchain and ensuring the masternode’s inclusion in the deterministic list.
Registration of a masternode can be accomplished through official Cosanta Core wallet.
Option 1: Sending from PancakeSwap through @piratecash_bot to Cosanta Core wallet
We recommend using the decentralized exchange PancakeSwap. However, after acquiring Cosanta tokens, you need to exchange them through the @piratecash_bot and transfer them to the Cosanta Core wallet.
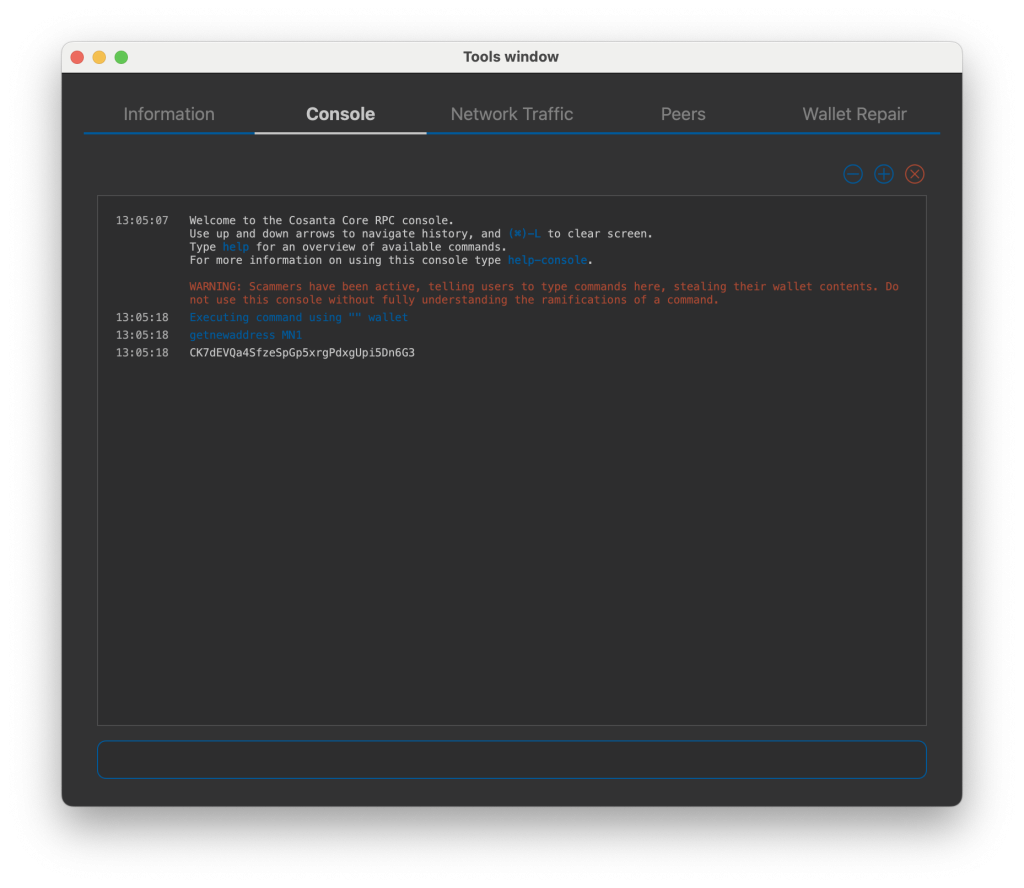
Click Window > Console to open the console. Type the following command into the console to generate a new Cosanta address for the collateral:
getnewaddress MN1
To send 10,000 COSA to this address via @piratecash_bot, you need to go to the ? Balance → COSA ? → ? Withdraw ? menu or execute the command /withdraw_cosa.
The next step is to secure your wallet (if you have not already done so). First, encrypt the wallet by selecting Settings > Encrypt wallet. You should use a strong, new password that you have never used somewhere else. Take note of your password and store it somewhere safe or you will be permanently locked out of your wallet and lose access to your funds. Next, back up your wallet file by selecting File > Backup Wallet. Save the file to a secure location physically separate to your computer, since this will be the only way you can access our funds if anything happens to your computer.
Install Cosanta Core
Cosanta Core serves as the underlying software for both the Cosanta Core GUI wallet and Cosanta masternodes. When the graphical user interface (GUI) is not in use, it operates as a daemon on your Virtual Private Server (VPS) under the name cosantad, with its functions managed through a straightforward command interface known as cosanta-cli.
Create a configuration file using the following command:
nano ~/.cosanta/cosanta.conf
rpcuser=XXXXXXXXXXXXX
rpcpassword=XXXXXXXXXXXXXXXXXXXXXXXXXXXX
rpcallowip=127.0.0.1
server=1
rest=1
listen=1
txindex=1
listenonion=0
maxconnections=700
masternodeblsprivkey=
externalip=XXX.XXX.XXX.XXX
Replace the fields marked with XXXXXXX as follows:
rpcuser: enter any string of numbers or letters, no special characters allowedrpcpassword: enter any string of numbers or letters, no special characters allowedexternalip: this is the IP address of your VPS
Please fill masternodeblsprivkey field commented by execute command bls generate in console and restart cosantad daemon.
Prepare a ProRegTx transaction
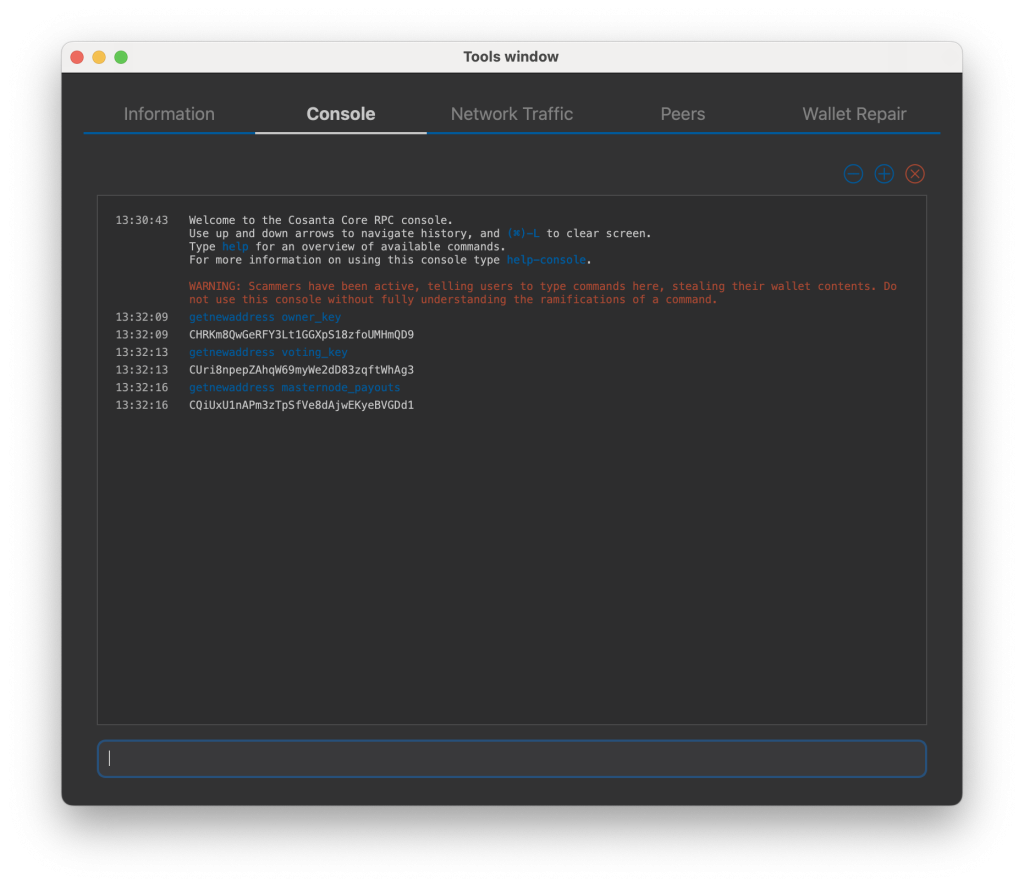
First, we need to get a new, unused address from the wallet to serve as the owner key address (ownerKeyAddr). This is not the same as the collateral address holding 10,000 COSA. Generate a new address as follows:
getnewaddress owner_key
This address can also be used as the voting key address (votingKeyAddr). Alternatively, you can specify an address provided to you by your chosen voting delegate, or simply generate a new voting key address as follows:
getnewaddress voting_key
Then either generate or choose an existing address to receive the owner’s masternode payouts (payoutAddress). It is also possible to use an address external to the wallet:
getnewaddress masternode_payouts
You can also you need to generate and fund another address as the transaction fee source(feeSourceAddress). If you selected an external payout address, you must specify a fee source address.
getnewaddress pay_fees
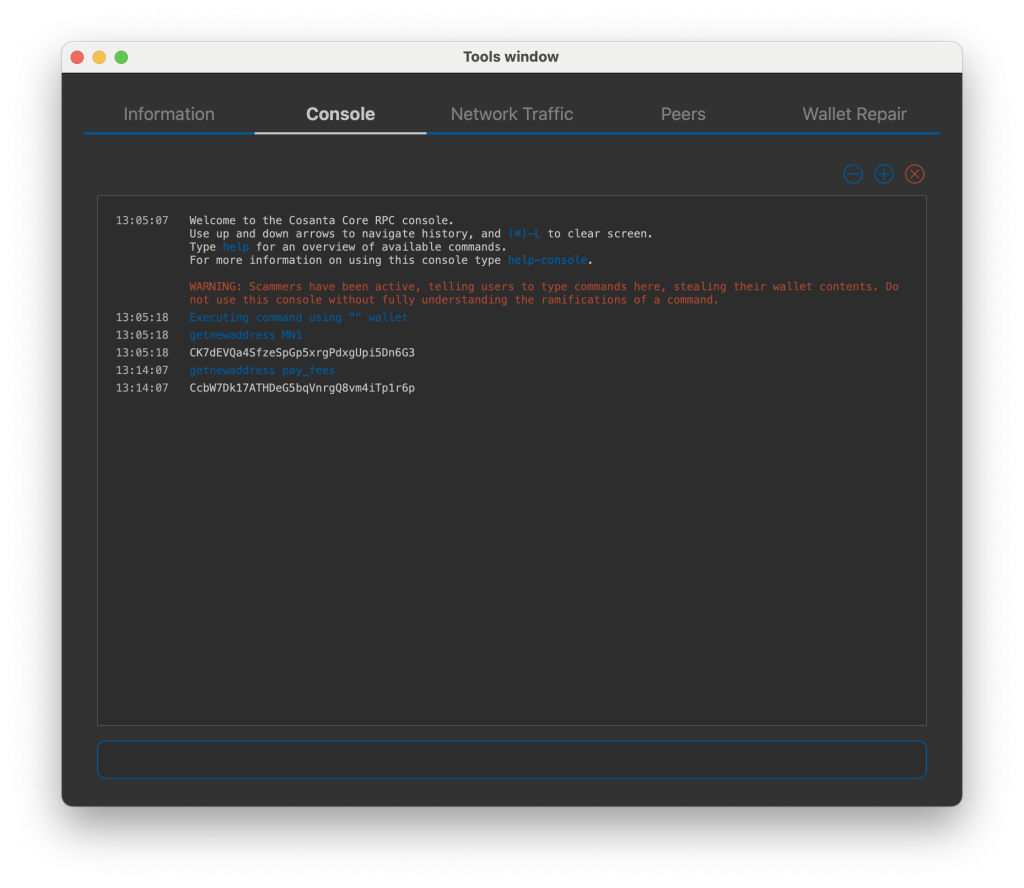
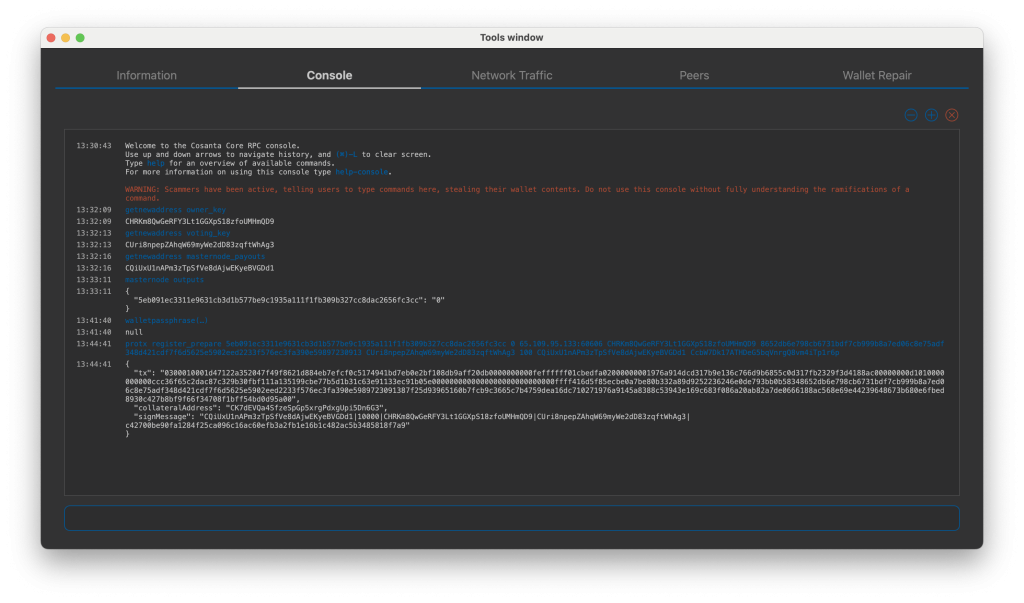
After you send exactly 10,000 COSA and a small amount of pay_fees, your balance will be as follows:

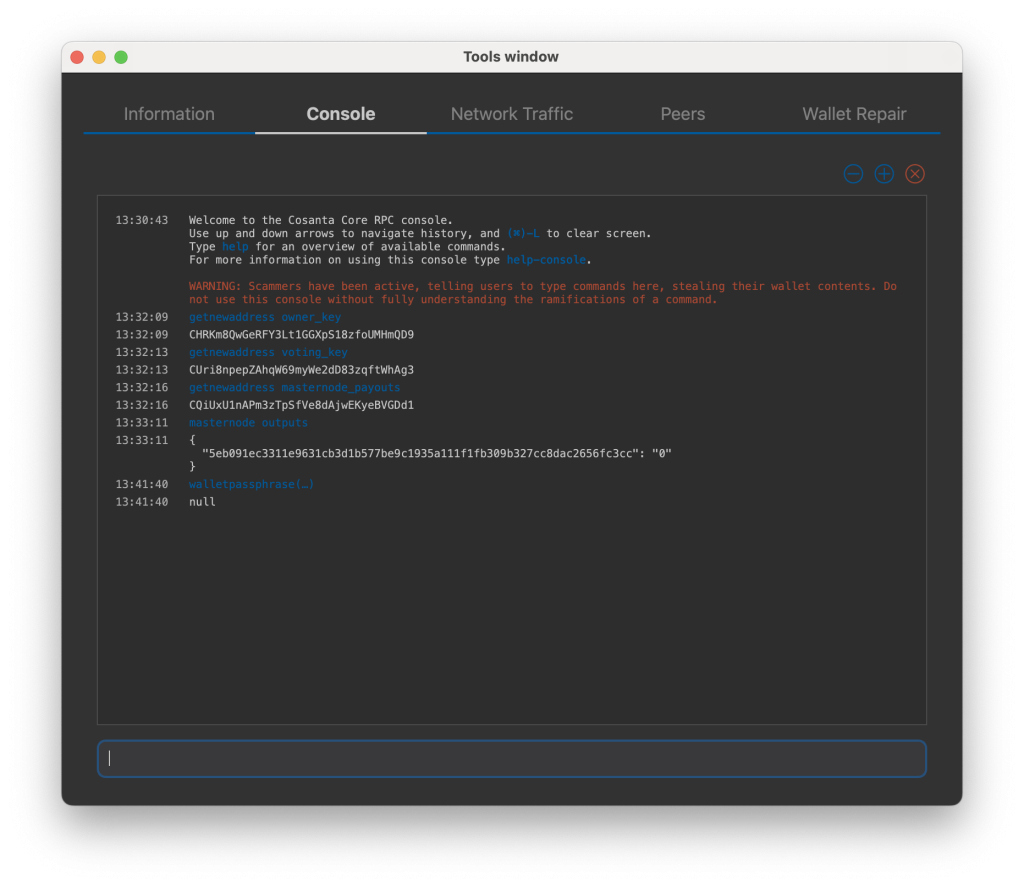
The wallet submitting the transaction to the network must possess the private keys for both the owner and fee source addresses. If your wallet is secured with a password, it must be temporarily unlocked to execute the subsequent commands. Unlock your wallet for a duration of 10 minutes:
walletpassphrase yourSecretPassword 600
We will now prepare an unsigned ProRegTx special transaction using the protxregister_prepare command. This command has the following syntax
protx register_prepare collateralHash collateralIndex ipAndPort ownerKeyAddr operatorPubKey votingKeyAddr operatorReward payoutAddress feeSourceAddress
Open a text editor such as notepad to prepare this command. Replace each argument to the command as follows:
collateralHash: The txid of the 10,000 COSA collateral funding transactioncollateralIndex: The output index of the 10,000 COSA funding transactionipAndPort: Masternode IP address and port, in the formatx.x.x.x:60606ownerKeyAddr: The new Cosanta address generated above for the owner/voting addressoperatorPubKey: The BLS public key generated above (or provided by your hosting service)votingKeyAddr: The new Cosanta address generated above, or the address of a delegate, used for proposal votingoperatorReward: The percentage of the block reward allocated to the operator as paymentpayoutAddress: A new or existing Cosanta address to receive the owner’s masternode rewardsfeeSourceAddress: Address used to fund ProTx fee.payoutAddresswill be used if not specified.
Example:
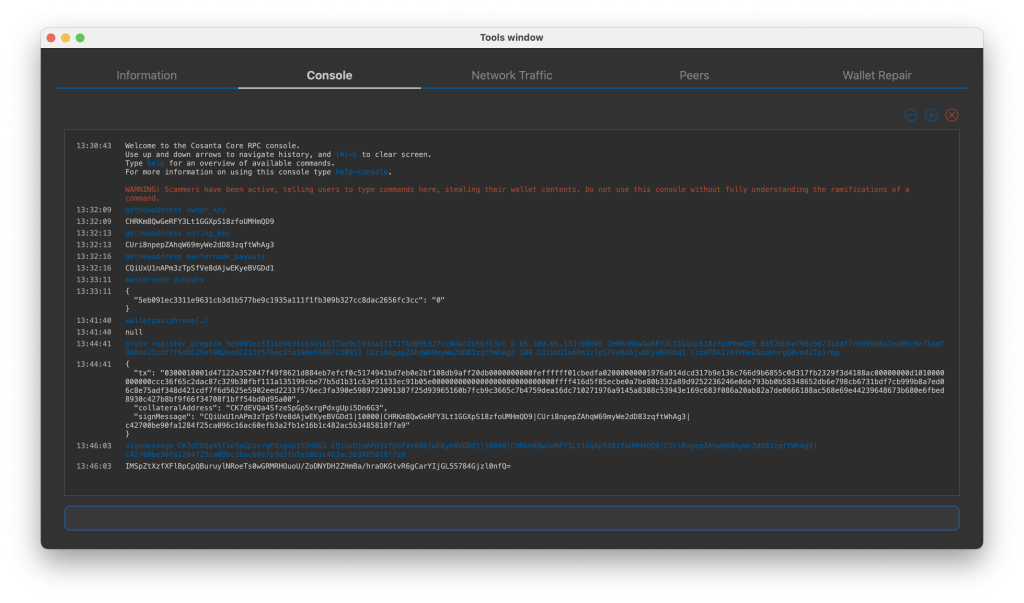
Sign the ProRegTx transaction
We will now sign the content of the signMessage field using the private key for the collateral address as specified in collateralAddress. Note that no internet connection is required for this step, meaning that the wallet can remain disconnected from the internet in cold storage to sign the message. In this example we will again use Cosanta Core, but it is equally possible to use the signing function of a hardware wallet. The command takes the following syntax:
signmessage collateralAddress signMessage
Example:
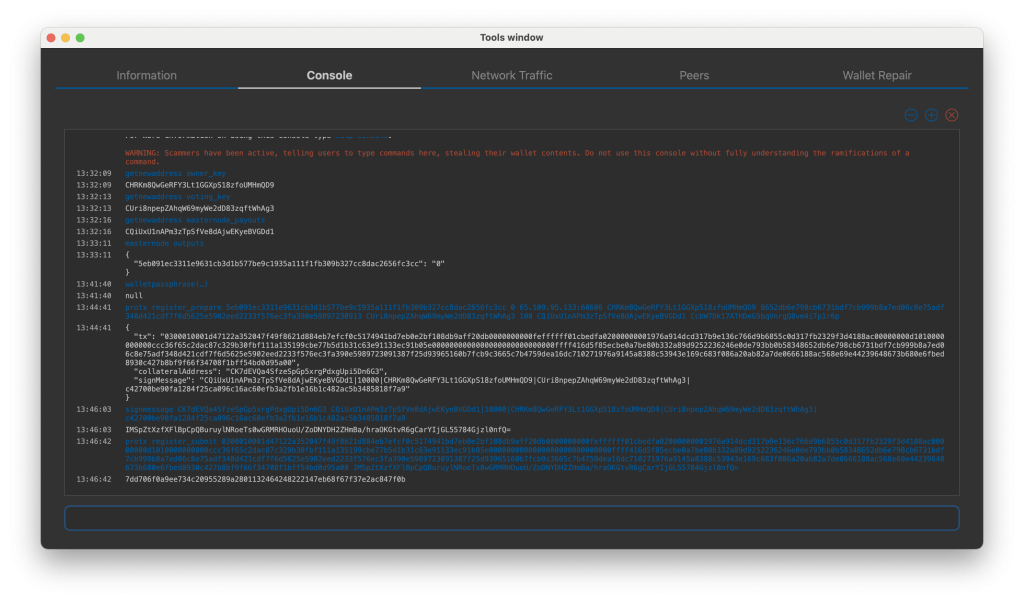
Submit the signed message
We will now submit the ProRegTx special transaction to the blockchain to register the masternode. This command must be sent from a Cosanta Core wallet holding a balance on either the feeSourceAddress or payoutAddress, since a standard transaction fee is involved. The command takes the following syntax:
protx register_submit tx sig
tx: The serialized transaction previously returned in thetxoutput field from theprotx register_preparecommandsig: The message signed with the collateral key from thesignmessagecommand
Example:
Your masternode is now registered and will appear on the Deterministic Masternode List after the transaction is mined to a block.

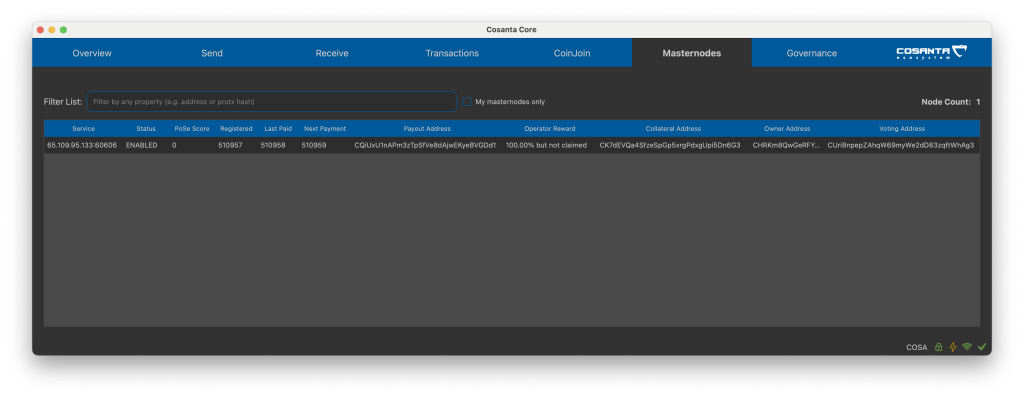
Now you can view masternode statistics on MNO and monitor income.
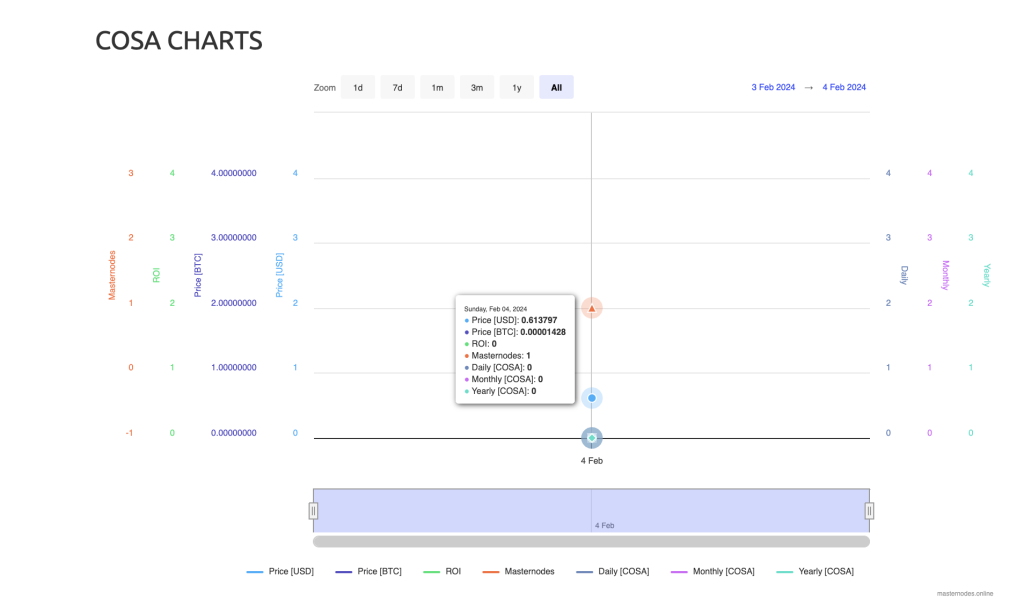
At the moment, the Cosanta masternode ranks 4th in terms of value. However, the ROI is currently displayed as 0% since the first payout for the masternode will occur only at block 525252. Rewards for the masternode will increase every 4 superblock cycles, which happens every 66464 blocks or approximately every 122 days.
